
Shot & Render Set-up

Myself and Ryan went through Animatic draft 07 and discussed who would set up and render certain scenes within cinema 4D. To the right is what was decided.
To keep on track of who to go to for certain animations I wrote down shots Daniel was animating regarding my render shots so I knew which animations to get from him, in doing so I could then write down shots which Ryan was animating and I was rendering.
Shot 3
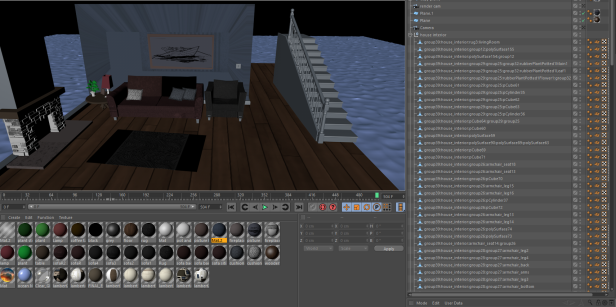

How Nathan did the textures was very awkward, taking me literally hours trying to set up. I was loosing my patience and wasn’t getting very far. So I asked Ryan to take shot 3 from me, since he had already went through all the pain already.
This was the best decision as I found out the living room scene that Nathan gave me didn’t contain the same assets as Ryan. I describe this in the facebook post to the right.
Shot 4
 Shot 6 is the extreme wide shot of the exterior of the house on the water. It is one of our beauty shots, so it is a bit pressurising.
Below is a timing test I did to show the team in order to know whether to go ahead with the render or not.
 To the left is the teams response to the timing test and to some test renders (also seen below).
It was taking upwards of up to 7 minutes to render one frame, I thought it was a little weird. However once I investigated into the material of the water (one I had made for a scene earlier in the semester), I realised it was the subsurface scattering creating the longer render times. Instead of using SSS I created a fresnel, it only slightly changed the still render, however it now took only 25 seconds to render.
When trying to baking the HOT4D animation I was made aware of the point cache: http://www.c4dcafe.com/ipb/forums/topic/81185-bake-hot4d-animation/
I needed to bake the animation in order for my team mates without the plugin to make use of the animation.
However, I had a bit of difficulty as it didn’t let me store the cache straight away, after some time I realised that this was because my plane wasn’t editable.
Here are the different renders-


After rendering I wanted to add a slight blur to the horizon in AE.
After effects tutorial;creating a blur mask.
It was pretty straight forward to achieve this goal, it is a subtle difference but I think it was needed.
I am aware the house is needed in this scene, however the textures at this point weren’t finalised by Nathan.
I need to re-render this shot in order for the house to look convincing in the water.
Shot 7
Shot 7 requires a fish eye effect, I thought doing it to each frame once rendered in Photoshop using that history repeating tool was the answer. I’m glad I was wrong. Just curious, I asked google if it was possible to achieve the effect while inside cinema 4D. Apparently you can and I am over the moon! I used the tutorial below.
And these are the results in the view port, I had quite the giggle.


I added a mask and then blurred around his face to give a false sense of depth of field. I also darkened the parts around the mask to give a more intimate feeling of closeness.


Shot 14
Shot 14 was very easy to set up within cinema 4D as an alembic, unlike the living room, Ryan had everything named correctly and only a few textures to plug in. I did have to ask Daniel for a lamp texture, however this wasn’t his fault as it didn’t load onto facebook correctly.
For some reason when I subdivided the pillow the character was lying on it disappeared in the render? I have no idea why that happened, I ended up having to duplicate the pillow below and readjust it accordingly and it worked again. It was a quick fix but it worked.


Each frame in shot 14 took around 43 seconds to render.
Shot 18
This animation wasn’t given to me correctly so with restricted time I had to leave it out of the short film completely.
Shot 19

This was one of the first animations that Daniel sent to me as an alembic file. He is inexperienced with exporting an alembic file, I told him to ask Ryan to go over it with him because Ryan knows correctly how to do it in order for it to work inside cinema. However he didn’t go to Ryan, and I ended up with this issue where the animation was working properly but the textures werent applying correctly. Below is the conversation between me and Ryan discussing the issue.
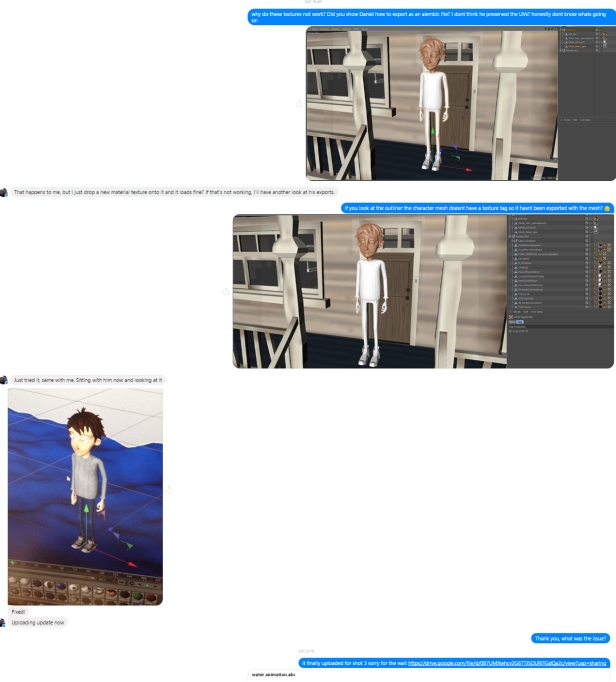
Shot 19 had to be rendered at a different angle than in the animatic due to the fact that only one hand was animated, with the other hand being stationary by his other side it looked very strange. It was hard getting a good angle and also trying not to go over the 180 degree rule.
Shot 21
This shot was straightforward. I reused Nathans idle animation for shot 27 since it is a wide exterior shot. For this scene I didn’t use any multipasses as I believe the end result only needs a few adjustments in post.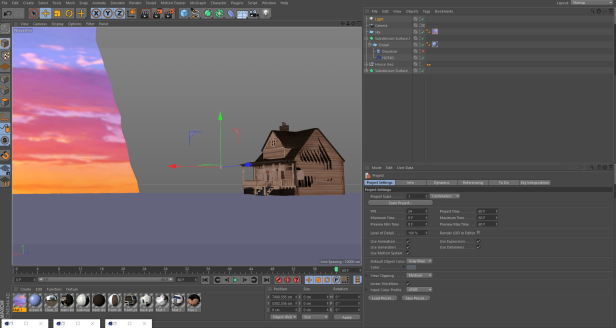
Shot 22&23
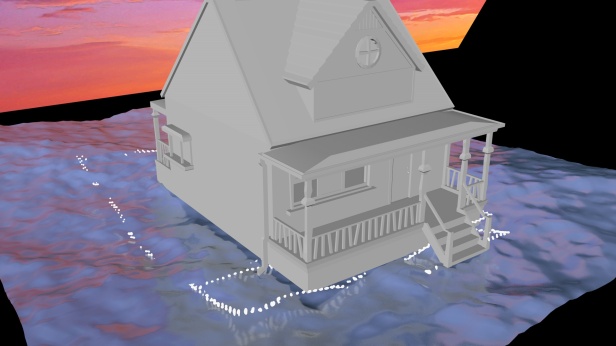
Within Realflow I was having difficulty with getting any sort of reaction between the water and the house geometry. However I found this video on youtube, showing splash working just fine with a passive rigid object, and in the comments he had left someone the scene file! I downloaded it and had a look at the settings below. The video can be found here.
I found that my house object wasn’t being uploaded correctly to the splash object in the settings for some reason.
 It is really frustrating that the house cant be an object which can influence the water, after fiddling around with settings thinking it was my inexperience of the software when it was the software itself. So now I’ve blocked out cubes filling where the main house sits. Strange that this didn’t happen with the wooden planks, but I found that it could be a bug. Still, I zeroed out the position and scale and nothing changed.


I was looking up on forums and stuff as well http://www.realflowforum.com/viewtopic.php?t=10590
Finally got particles to work as a mesh inside cinema4d
Although it doesn’t look like foam due to the density I set being too low. It had to be this way because of time constraints. However due to this I can’t use the foam now, it was nice to get the progress to work though.
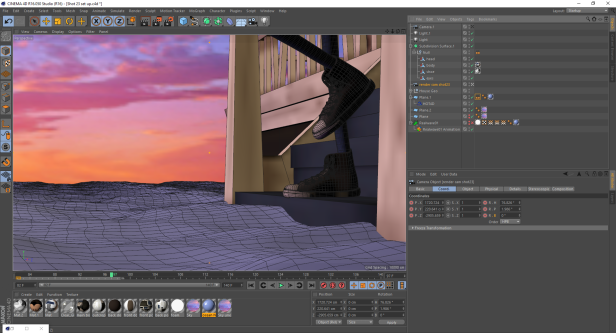
Shot 24
I had to animate the up and down motion of the character stepping onto something as you can see below.


I had trouble lighting this scene for some reason. I guess its because it had no water? Haha, waters my thing, I tried my best though.
Shot 25&26
I talk about shot 25’s set up in the Look Development post. Shot 26 is a very simple camera move forward in shot 25’s scene and hitting render. Shot 26 is taking up to 2 minutes to render a frame.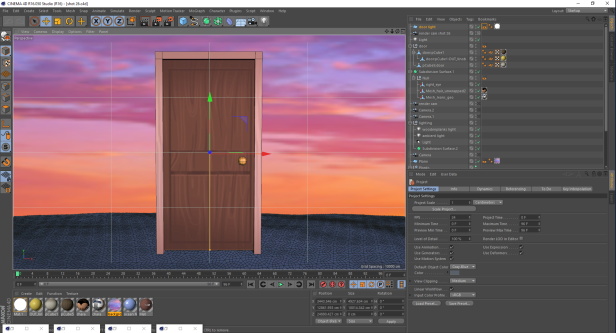
Shot 27
Shot 27 was easy enough to set up. Each of the 96 frames in this shot took around 1 minute each. I also thought it would be nice to animate the sky as if the clouds were moving in the otherwise still scene, I think it adds more atmosphere. For this scene I didn’t use any multipasses as I believe the end result only needs a few adjustments in post.

AfterEffects
Well the first issue I ran into was importing the files, I forgot that on my laptop I had done the same thing in order to import an AEC. file into aftereffects so I followed this tutorial below and it worked.
Learning how to use modes for blending effects like I do in Photoshop, it was nice to learn that the short cut through the blend was shift +/-, made my life so much easier!
Knowing I would have a lot of files and projects I decided it would be a good idea to look into organisation within afteraffects. I found this video
It explains it very well, also handy to know how to delete unused files easily! This method really saved me time when compiling each render together the main comp file.
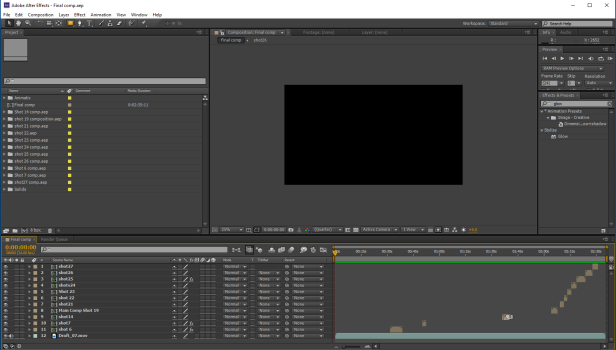 The final composition took 4 minutes 43 seconds to render inside aftereffects.
ANDDDD here it is! The final Composition! However, we didn’t have time to add sound unfortunately.
